deadman
Glued Fingers
 you wanna play with the big dogs on the track? then get ready for a beating then!!
Posts: 116
|
Post by deadman on Jun 3, 2010 13:47:29 GMT -5
could someone please let me know how this stuff works and how to use it AND along with what I need. I would really love to take the next phase in the model building and try this inside of some of my upcoming builds. thanks guys!  |
|
|
|
Post by virgil on Jun 3, 2010 16:55:14 GMT -5
I take the flocking with me to walmart, back to the arts and crafts section. I go to the Apple Barrel Paints, and decide what color comes closest to the flocking. Keep in mind the paint dries a few shades darker than what it looks like in the bottle, so you may want to go a shade or two lighter with the paint. Now that you have your paint, i do it in sections. If you do too much at one time, the paint will dry before you sprinkle flocking over it. I use a clean instruction sheet, laid on the table under my work area. Do all of your flocking work over the instruction sheet, piece of paper, or what ever you are using, to catch the loose flocking, as you can fold the paper, and put it back in your container for future use. I will use an interior bucket for reference. On the floor boards, i will do it in 5-8 sections. I start in the front floor board on one side, use a fairly large paintbrush approximately 1/8" to 3/16" wide/round, to apply the paint to the surface. I do the firewall part of the carpet first. I apply the paint in an even, but slightly thick coat, sprinkle the flocking on it, there is no such thing as sprinkling a little, you have to put a good amount of flocking on it, so it doesnt come out too thin. I use the flat bottom of an exacto knife, or any tool that is small diameter, with a flat bottom, to "tamp", or "pack" the flocking into the paint. Make sure you tamp the whole area where you painted. Now i let it set for 5-15 minutes to set up some. Now, i turn it upside down over my paper, and use my exacto knife to tap on the side, and/or bottom of the interior bucket. Do this for about 15-20 seconds, until most of the loose flocking falls out onto the paper. I then blow on the part i just flocked, to get most of the remaining flocking fibers out of the tub. You will NEVER get all of the fibers out...LOL. That's it, you just repeat until the whole carpet area is flocked. The sequence i do it in, is this: 1) firewall area. 2) Front floorboards, "1" side at a time. 3) Rear floorboards. "1" side at a time 4) driveshaft tunnel. Do in 2 sections, unless it is a small, then you can do it in one shot. When coming up to a dried flocking area, dont sweat it. Load your brush with paint, and slowly push the tip of your brush up to the very edge of the flocking. Dont worry if you get some on the present flocking, once you tamp down the flocking into the paint, it will hide the seam. I hope this helps you out. If you have any problems, please dont hesitate to email me. virgil_1966@msn.com If i had a cam-corder, i could show you how to do it....lol Virgil |
|
deadman
Glued Fingers
 you wanna play with the big dogs on the track? then get ready for a beating then!!
Posts: 116
|
Post by deadman on Jun 4, 2010 13:08:45 GMT -5
thanks Virgil! to tell ya the truth your the one that has inspired me to try this for the first time. the cars I have seen of yours on other sites and here with the flocking done to it tells me I gotta take it up to the next step in model building. once again thank you my friend!  Troy |
|
|
|
Post by virgil on Jun 5, 2010 9:07:51 GMT -5
thanks Virgil! to tell ya the truth your the one that has inspired me to try this for the first time. the cars I have seen of yours on other sites and here with the flocking done to it tells me I gotta take it up to the next step in model building. once again thank you my friend!  Troy You are very welcome. Thank you for the compliment!! Once you figure it out, it is actually very easy, but it is time consuming. You see the end result, and know it was worth it. Thanks again my friend. Virgil |
|
|
|
Post by Count Dragula on Jun 5, 2010 15:32:46 GMT -5
Deadman, I use Ken's Fuzzy Fur from Scale Dreams Wesite.Here is a link.(You will need to scroll about halfway down the page to see the different colors) stores.scaledreams.com/-strse-Kens-Kustom-Kar/Categories.bokHere is my finished Vandal using the Gold color: 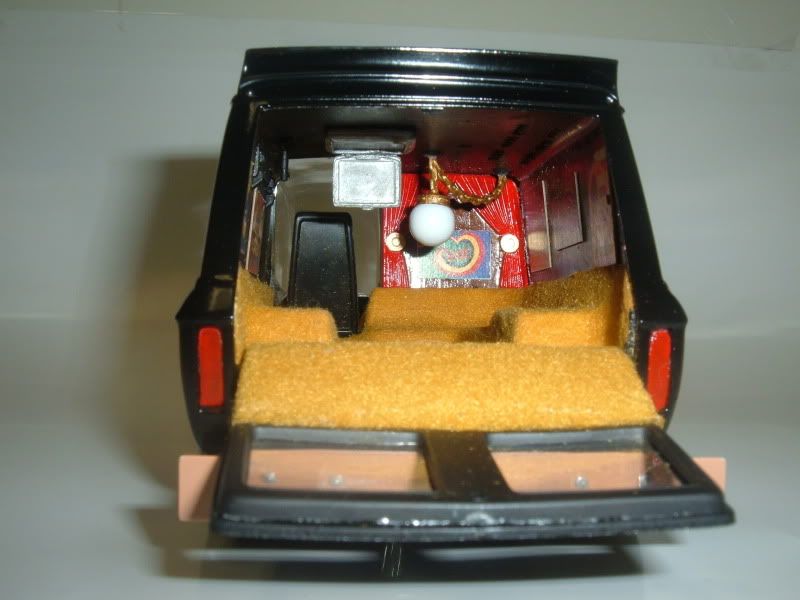 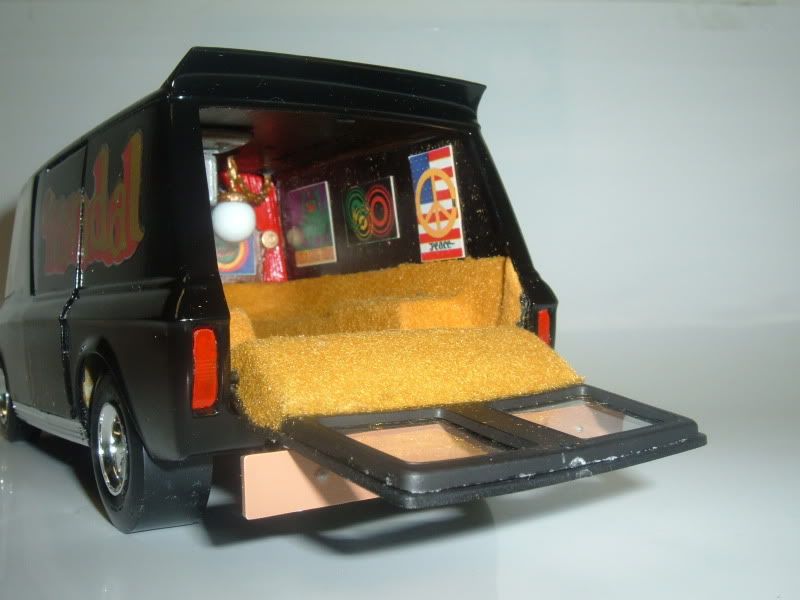 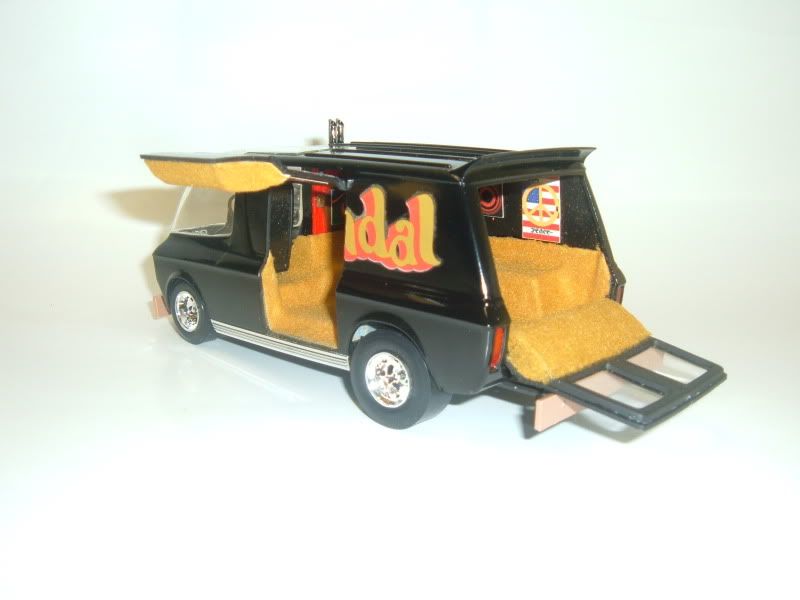 I used 3M's photomount in an aerosol can (from Walmart),then I sprinkled the carpet material on.Pressed it in place,then tapped the excess out.....I had great success using Ken's Fuzzy Fur,and the 3M Photomount method.One can goes a long way,I'm not knocking the paint method mentioned here,BTW!!!!The 3M method worked really well for me, I conserved my paint too!.....I will "stick" with the 3M method! Hope this helps. Todd ----PS ----The 3M photomount spray works great as a Vinyl top base coat,too! |
|
deadman
Glued Fingers
 you wanna play with the big dogs on the track? then get ready for a beating then!!
Posts: 116
|
Post by deadman on Jun 9, 2010 2:36:01 GMT -5
that is some nice flocking there trussell5150!!
|
|
|
|
Post by MoparMarc68 on Jun 9, 2010 13:13:40 GMT -5
Here is another flocking supplier and method for applying it. I get my flocking from this ebay seller: stores.ebay.com/Katevo-Creations-and-Flocking_Flocking_W0QQ_fsubZ1765277015QQ_sidZ23163305QQ_trksidZp4634Q2ec0Q2em322You get so much more for your money than you do with Testors or Ken's. As for applying flocking, I use Elmers glue. Its a great way for beginners cause if you don't like the way it turned out, just stick the interior tub under some warm water and rinse it out and start over LOL. I do it in sections similar to Virgil so the glue doesn't dry before I get to it. I also use a small sifter to keep any clumps from getting on the parts cause that can leave a bare spot. Here is a pic from when I did the interior of my still un-finished '69 GTX convert: 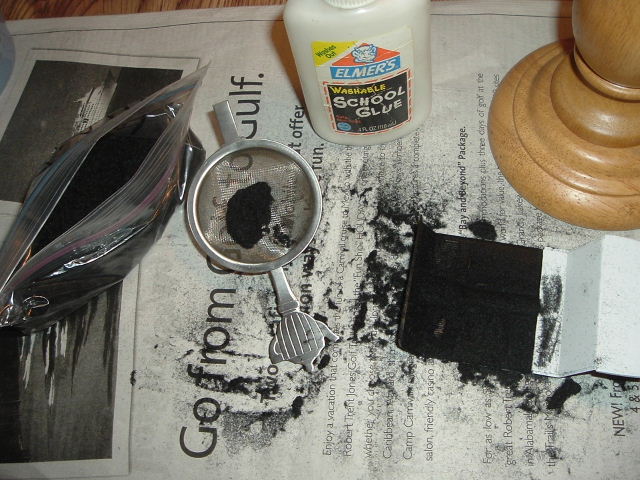 Hosted on Fotki Hosted on FotkiOnce I have a good covering i will "pack" the flocking on with something flat like end of the exacto knife and for tight corners I will use the end of a paint brush. I will let is set for about 10 or so minutes then I will hit it with the hair dryer (shhhh don't tell the wife) with the heat on and the fan on low to help speed the glue drying. Then I will use a large puffy brush and gently go over it knocking off any loose flocking. Oh and like Virgil I do this all over the instructions or a piece of newspaper. Here is the finished interior: [a href="  "] "] [/a] Hosted on Fotki[/url] |
|
deadman
Glued Fingers
 you wanna play with the big dogs on the track? then get ready for a beating then!!
Posts: 116
|
Post by deadman on Jun 12, 2010 10:58:31 GMT -5
ok I took the advice from you guys and I gladly appreciate it alot! and it was easy to do. well here is my results of my first flovking job.   and this is what I picked up at Micheals for my flocking. it is the Martha Stewart flocking stuff. pretty cheap and there is alot in a bottle so I picked up another bottle for another project down the future |
|
|
|
Post by virgil on Jun 13, 2010 11:41:31 GMT -5
Troy, you have done a great job on your first flocking adventure. I wish my first time of flocking had come out that good..lol. I didnt have anybody to teach me, i had to learn on my own....lol As with the white glue, if you use the acrylic paints as i do, if you mess up, it will wash off under warm water, or with the paints i use, it will rub off. Now that you have mastered it, i want to see a 2, 3 & 4 tone flocking job ;D ;D ;D. Another hint for you, if you want a custom look in the interior, i also use flocking for the headliner. It gives the appearance of a crushed velvet, or a cloth look like the old cars used.Great job troy!!!
Virgil
|
|
deadman
Glued Fingers
 you wanna play with the big dogs on the track? then get ready for a beating then!!
Posts: 116
|
Post by deadman on Jun 13, 2010 17:54:47 GMT -5
uh? NO! no 2, 3, 4, tone jobs yet Virgil for me! I'll leave that to you my friend! now the headliner yes I can do. as we all know some of those old cars out there do have those cloth/velvet headliners in them.  and once again thanks for the input.  Troy, you have done a great job on your first flocking adventure. I wish my first time of flocking had come out that good..lol. I didnt have anybody to teach me, i had to learn on my own....lol As with the white glue, if you use the acrylic paints as i do, if you mess up, it will wash off under warm water, or with the paints i use, it will rub off. Now that you have mastered it, i want to see a 2, 3 & 4 tone flocking job ;D ;D ;D. Another hint for you, if you want a custom look in the interior, i also use flocking for the headliner. It gives the appearance of a crushed velvet, or a cloth look like the old cars used.Great job troy!!! Virgil |
|
deadman
Glued Fingers
 you wanna play with the big dogs on the track? then get ready for a beating then!!
Posts: 116
|
Post by deadman on Jun 13, 2010 18:09:39 GMT -5
well here is the finish results on the interior completely done. went with leather seats, 4 speed manual on the floor, and the original/stock gauges.  |
|
|
|
Post by virgil on Jun 14, 2010 7:58:26 GMT -5
It is looking sweet my friend. It is amazing how much different an interior looks with a little bit of flocking on it. Something i forgot to mention in my how-to, before i flock, i use a .05 mm leaded pencil, and trace around the base of the seats, and console, if it has one, and run my flocking just over that line. That way, you still have bare plastic to glue to. I have to find a camcorder to do a live show of how i do it. Sorry i forgot to mention that. Yours looks so sweet!!! Very well done!!!
Virgil
|
|
deadman
Glued Fingers
 you wanna play with the big dogs on the track? then get ready for a beating then!!
Posts: 116
|
Post by deadman on Jun 15, 2010 12:05:44 GMT -5
AHHH! THANK YOU VIRGIL SON! YOU GREAT TEACHER! ME GREAT STUDENT TO LISTEN TO TEACHER!!  It is looking sweet my friend. It is amazing how much different an interior looks with a little bit of flocking on it. Something i forgot to mention in my how-to, before i flock, i use a .05 mm leaded pencil, and trace around the base of the seats, and console, if it has one, and run my flocking just over that line. That way, you still have bare plastic to glue to. I have to find a camcorder to do a live show of how i do it. Sorry i forgot to mention that. Yours looks so sweet!!! Very well done!!! Virgil |
|
|
|
Post by virgil on Jun 16, 2010 10:25:31 GMT -5
Very good grasshopper, you learn very well hahahaha!!
Virgil
|
|